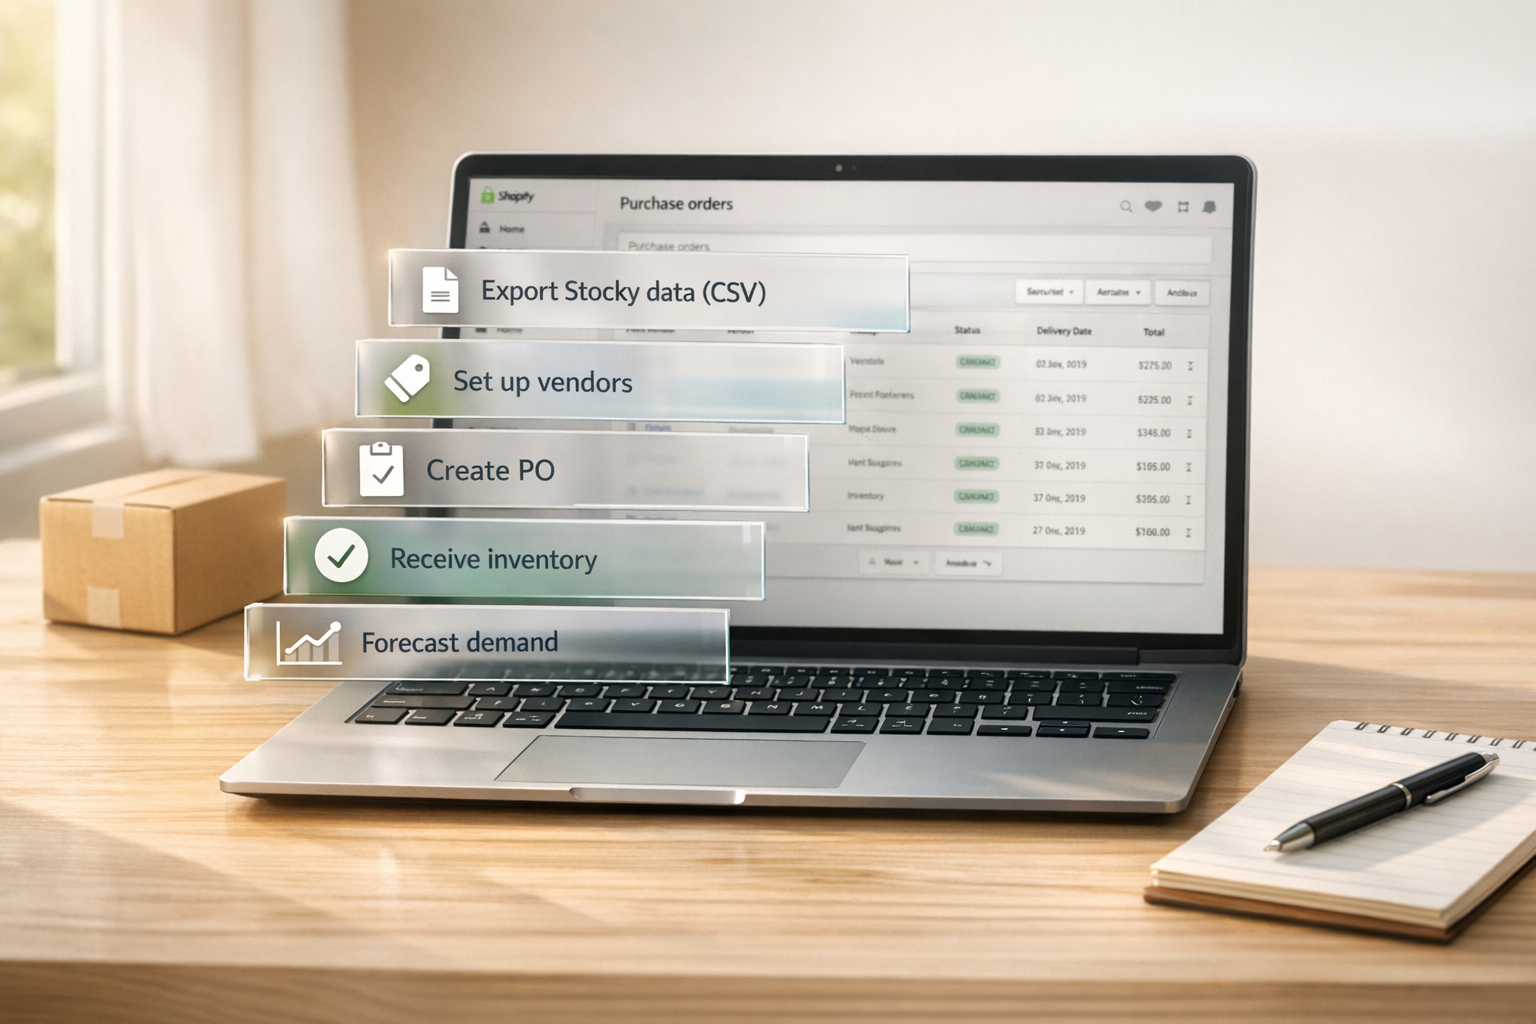
How to Create Purchase Orders in Shopify After Stocky Shuts Down
Export Stocky data, set up vendors in Shopify Admin, create and receive POs, and explore tools for automated forecasting.
How to Create Purchase Orders in Shopify After Stocky Shuts Down
When Stocky officially shuts down on August 31, 2026, many businesses will need to rethink how they manage purchase orders in Shopify. While Shopify Admin provides basic tools to create and receive purchase orders, it lacks advanced automation features like demand forecasting, lead time tracking, and multi-supplier management. Here's what you need to know to prepare for the transition:
- Stocky Data Loss: Export all purchase order history, supplier details, and demand forecasting settings before the shutdown. Shopify will not transfer this data automatically.
- Shopify Admin Basics: Shopify Admin allows manual purchase order creation, receiving inventory, and tracking stock levels. However, it only supports one supplier per product and lacks features like multi-currency pricing or landed cost calculations.
- Challenges: Businesses with complex workflows may find Shopify Admin’s manual processes time-consuming, especially for managing large SKUs, multi-location inventory, or supplier data.
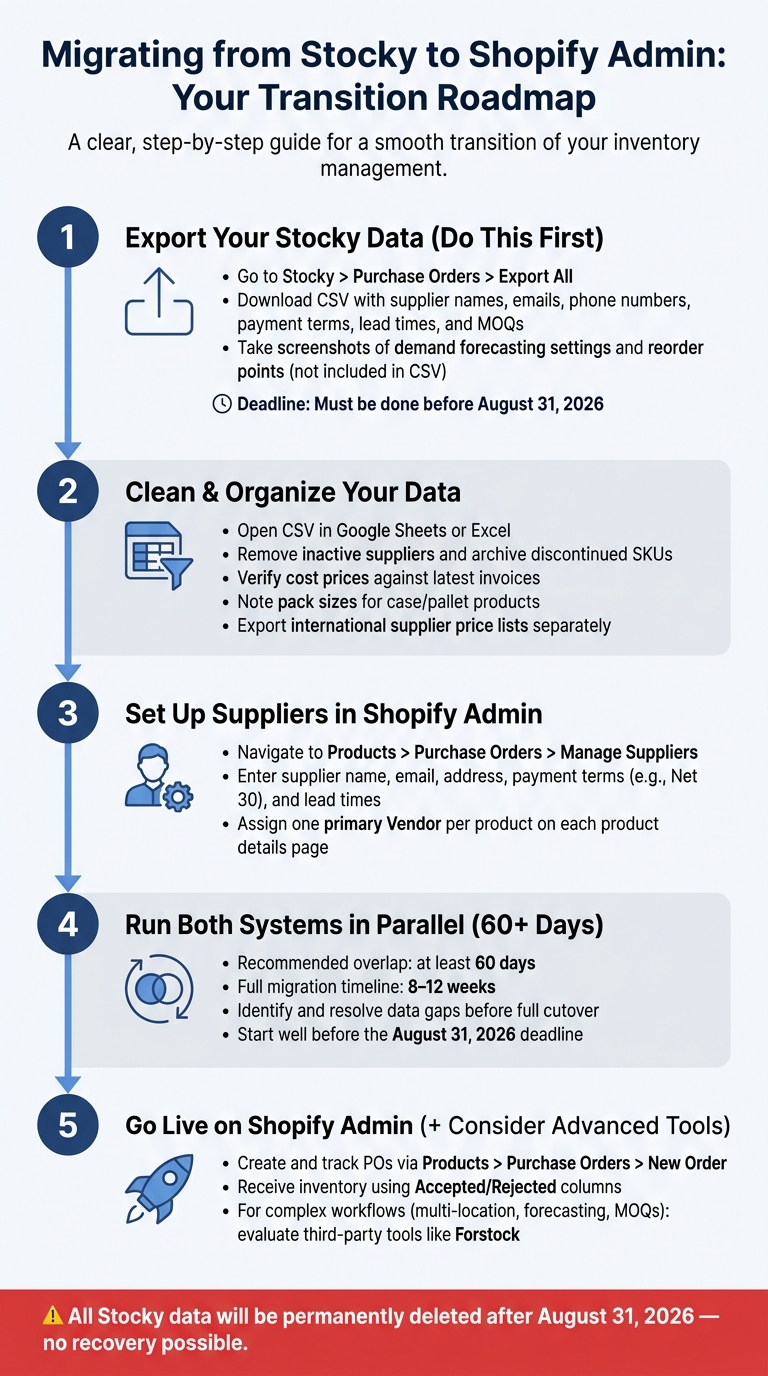
- Advanced Tools: Consider third-party apps like Forstock for features such as AI-driven demand forecasting, automated purchase orders, and centralized supplier management.
To ensure a smooth transition, start preparing early by exporting and organizing your data, running both systems in parallel, and exploring tools to fill Shopify Admin’s gaps.
Shopify Admin's Purchase Order Features: What You Get and What's Missing
What Shopify Admin Can Do for Purchase Orders

Shopify Admin includes a built-in purchase order (PO) system at no extra cost. It lets you select products, set quantities, define payment terms, and choose an estimated arrival date - all while using your store's currency. Once you mark a PO as "Ordered", it moves into the receiving stage. Here’s how it works:
- Items marked as received are immediately moved from incoming stock to available inventory.
- Discrepancies can be corrected using negative adjustments (e.g., entering "-1" to reduce the count).
The system also handles partial shipments. According to the Shopify Help Center:
"If you mark 5 as received, then they would become available inventory in your store, and there would still be 5 as incoming inventory." - Shopify Help Center
This means you can receive part of a shipment while keeping track of the remaining items as incoming. If damaged items arrive, you can mark them as "Rejected", which automatically removes them from the incoming stock count. And if you realize a mistake after saving a receipt, you can adjust it with a negative entry.
While these features cover the basics, they may not be enough for businesses with more complex purchasing needs.
Where Shopify Admin Falls Short for Complex PO Workflows
Although Shopify Admin simplifies basic purchase order tasks, it lacks the depth needed for more advanced workflows. Here's a comparison to illustrate the limitations:
| Capability | Shopify Admin | Forstock |
|---|---|---|
| Demand Forecasting | Manual review only | AI-driven reorder suggestions |
| PO Creation | Manual entry required | Automated based on low-stock triggers |
| Supplier Management | Basic vendor details | Tracks lead times, MOQs, and order multiples |
| Ordering Units | Individual units only | Supports case packs and pack sizes |
| Landed Costs | Not supported | Includes freight, duties, and cost breakdowns |
| Multi-Location | Basic receiving process | Allows split orders and flexible syncing |
For businesses managing a large number of SKUs or operating across multiple warehouses, Shopify Admin’s manual processes can quickly become overwhelming. For example, tracking essential supplier details like lead times or minimum order quantities often requires external tools like spreadsheets. This lack of automation can lead to inefficiencies and errors.
Take automated PO creation as an example - it can save supply chain managers over 10 hours a week. Meanwhile, relying solely on manual forecasting increases the likelihood of stockouts or overordering, both of which can be costly.
These shortcomings underline the need for more advanced tools to streamline and automate purchase order workflows.
sbb-itb-f0fc809
How To Set Up A Purchase Order In Shopify (Beginner Guide 2026)
How to Prepare for the Move from Stocky to Shopify Admin
How to Migrate from Stocky to Shopify Admin: Step-by-Step Transition Guide
Exporting Your Data from Stocky
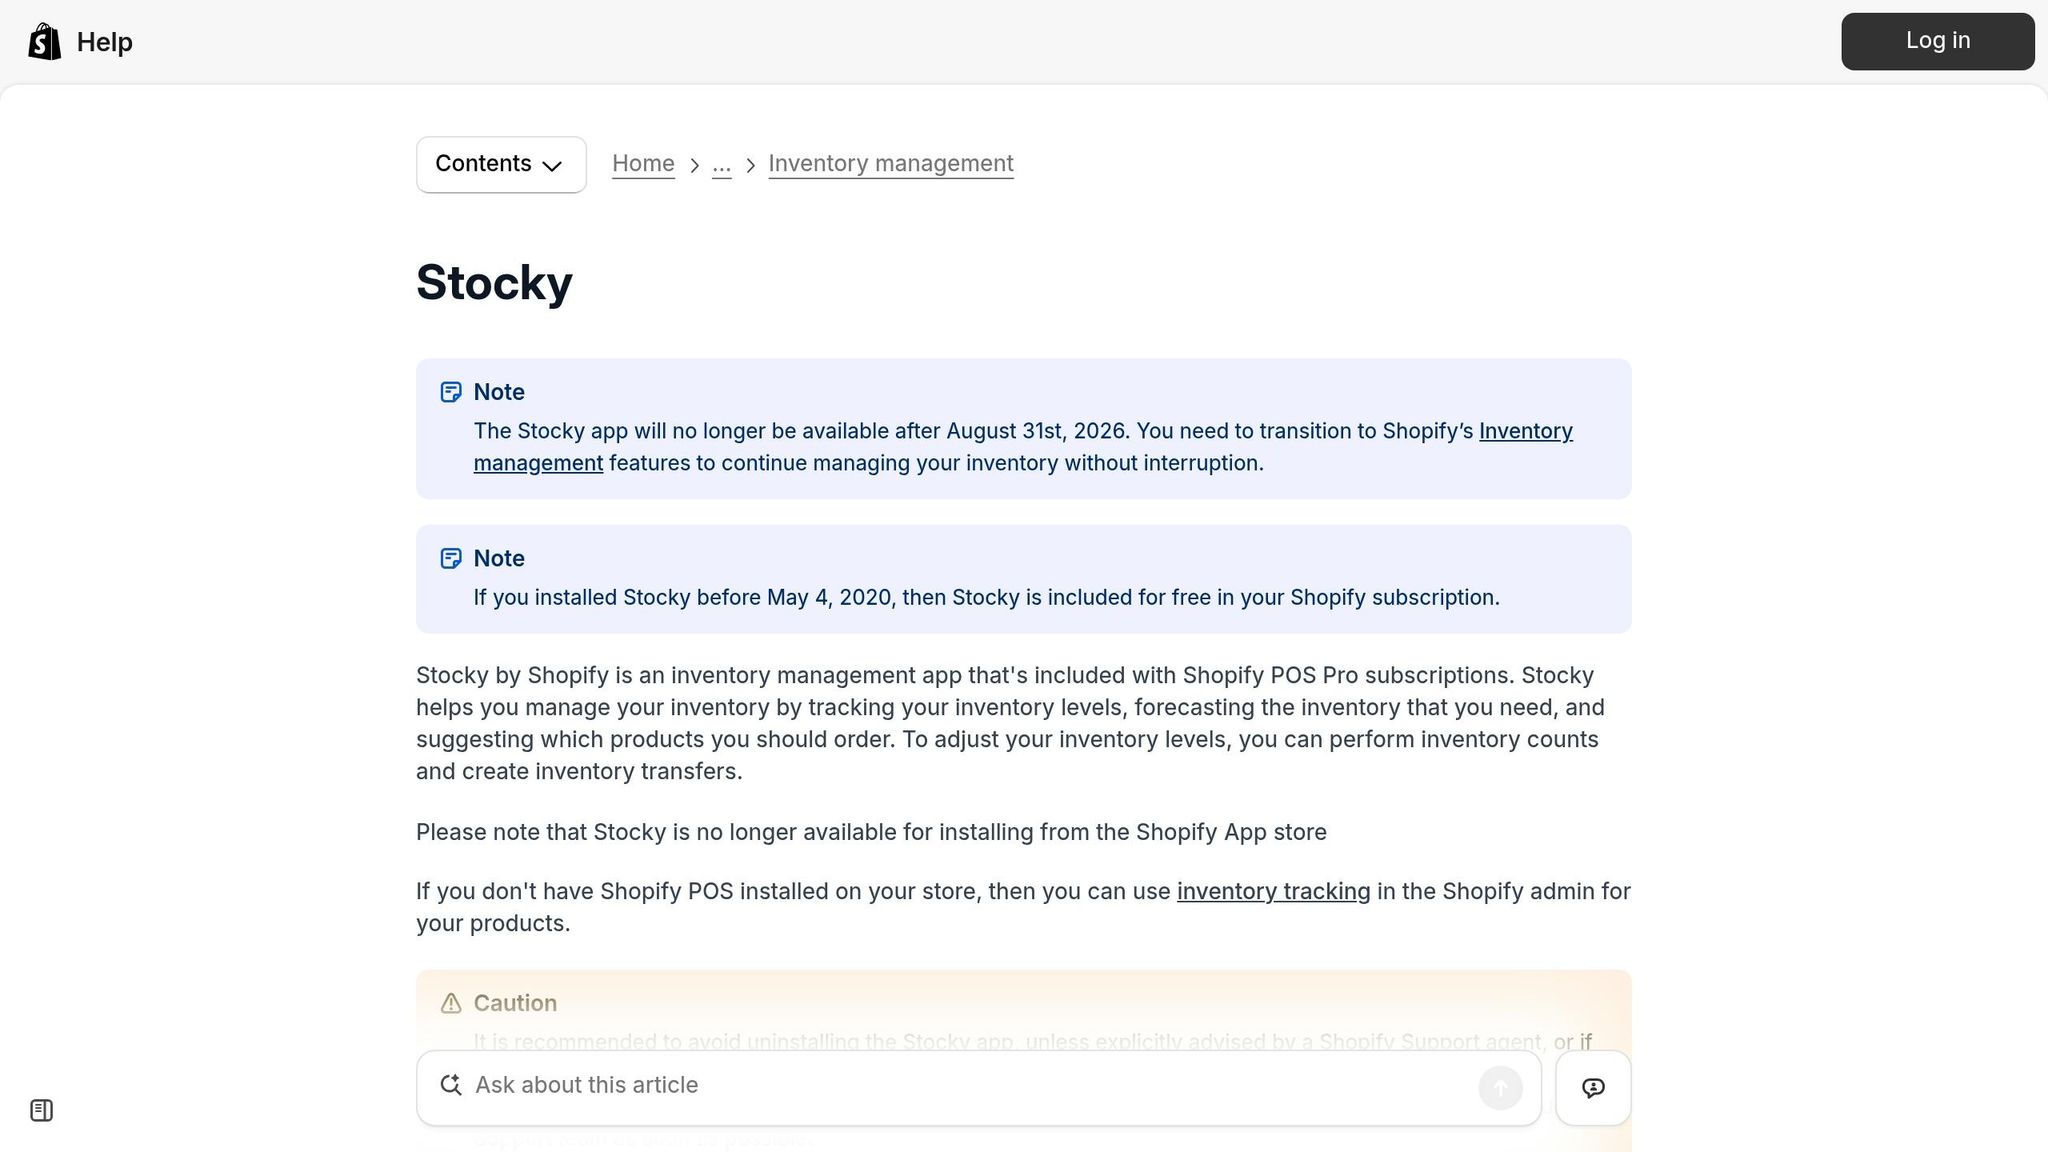
Important Reminder: Shopify has confirmed that all data stored in Stocky will be permanently deleted after August 31, 2026, with no option for recovery. This includes your entire purchase order history, supplier profiles, and any demand forecasting configurations you've set up.
"Stocky will be removed from your store and all data within it will be permanently lost... you will lose all purchase order history, supplier data, and any demand forecasting configuration." - Canopy
To save your data, head to Stocky > Purchase Orders > Export All. This will download a CSV file containing key details such as supplier names, email addresses, phone numbers, payment terms, lead times, and minimum order quantities (MOQs). Once you've got the file, open it in Google Sheets or Excel to clean it up: remove inactive suppliers, archive discontinued SKUs, and double-check cost prices against your latest invoices. Keep in mind that Stocky sometimes holds cost data that hasn’t synced back to Shopify Admin, so verifying against invoices is essential.
Additionally, take screenshots of your demand forecasting settings and reorder points. These details are not included in the CSV export and will be lost when Stocky shuts down.
Once your data is exported and organized, you can shift your focus to preparing supplier details for the transition.
Organizing Supplier Details and Lead Times Before You Switch
Switching systems requires extra attention to how supplier details are managed. Shopify Admin operates differently than Stocky. For example, in Shopify Admin, each product can only have one vendor, and all pricing is tied to your store’s base currency. In contrast, Stocky allows multiple suppliers per product, each with their own pricing (even in different currencies) and pack sizes. These differences mean you'll need to adapt your supplier data accordingly.
| Feature | Shopify Admin (Vendor) | Stocky |
|---|---|---|
| Suppliers per product | One | Multiple |
| Pricing | Single cost price, store currency only | Multiple prices, any currency |
| Ordering units | Individual units only | Supports pack sizes |
Begin by reviewing supplier details in Stocky through Suppliers > Settings > Details. Record lead times, MOQs, and pack sizes manually. For products that are ordered in cases or pallets, make a note of the pack sizes since Shopify Admin defaults to individual units. If you work with international suppliers, don’t forget to export their price lists, as Shopify Admin doesn’t support multi-currency cost tracking.
The migration process typically takes 8–12 weeks, and it’s recommended to run both systems in parallel for at least 60 days. This overlap helps you identify and address any data gaps before fully transitioning to Shopify Admin. Starting early - well before the August 31 deadline - gives you enough time to ensure everything is accurate without feeling rushed. Proper preparation will make the switch smoother and help maintain efficient purchase order management after Stocky.
How to Create Purchase Orders in Shopify Admin: Step-by-Step
Adding Suppliers and Products in Shopify Admin
Once your supplier information is ready, the next step is entering it into Shopify Admin. Start by navigating to Products > Purchase orders, then choose the option to manage suppliers. Here, you'll input details like the supplier's name, email, address, default payment terms (e.g., Net 30), and estimated lead times.
Before creating purchase orders (POs), ensure the Vendor field is filled out for every product on its details page. This field is essential because Shopify Admin links products to suppliers based on it when generating POs. Keep in mind that Shopify allows only one vendor per product. If a product previously had multiple suppliers in Stocky, you'll need to designate a primary vendor.
"Purchase orders let you track and manage inventory that you order from suppliers. You can record product quantities, prices, payment terms, and estimated arrival dates to keep your stock levels accurate." - Shopify Help Center
With suppliers and product details in place, you're ready to move on to creating and managing your purchase orders.
Creating and Tracking a Purchase Order
After setting up supplier data, it's time to create a purchase order. Go to Products > Purchase orders, then click New Order. Select the supplier, and add the necessary products as line items. For each product, enter the unit cost in USD, the quantity you're ordering, and an estimated arrival date.
Once saved, the PO will appear with an Open status. After the supplier confirms the order, update the status to Ordered. As shipments arrive, the status will change to Partially received or Completed, offering a clear view of what's been delivered and what’s still on the way.
Receiving Inventory and Updating Stock Levels
When shipments arrive, you’ll need to update your inventory records. Open the relevant PO under Products > Purchase orders, then click Receive inventory. You'll see two columns: Accepted for items that are in good condition and Rejected for items that are damaged or missing. Products entered in the Accepted column are moved from incoming to available inventory automatically, while items marked as Rejected are removed from the incoming count without affecting available stock. This process is especially helpful for filing claims with suppliers.
For example, if you ordered 50 units but only 40 arrive in good condition, input 40 in the Accepted column and save. The remaining 10 units will stay in incoming status until they arrive or the PO is adjusted. If you make a mistake, like accepting 41 units instead of 40, you can correct it by clicking Receive inventory again and entering -1 in the Accepted column.
For stores with multiple locations, make sure to set the Destination field on the PO to the appropriate warehouse or storefront before receiving inventory. This ensures stock is allocated to the correct location, avoiding manual adjustments later.
| Action | Effect on Incoming Inventory | Effect on Available Inventory |
|---|---|---|
| Mark as Accepted | Decreases by amount accepted | Increases by amount accepted |
| Mark as Rejected | Decreases by amount rejected | No change |
| Partial Receipt | Decreases only by amount processed | Increases only by amount accepted |
| Negative Adjustment | Increases by the absolute value entered | Decreases by the absolute value entered |
How Forstock Handles What Shopify Admin Cannot
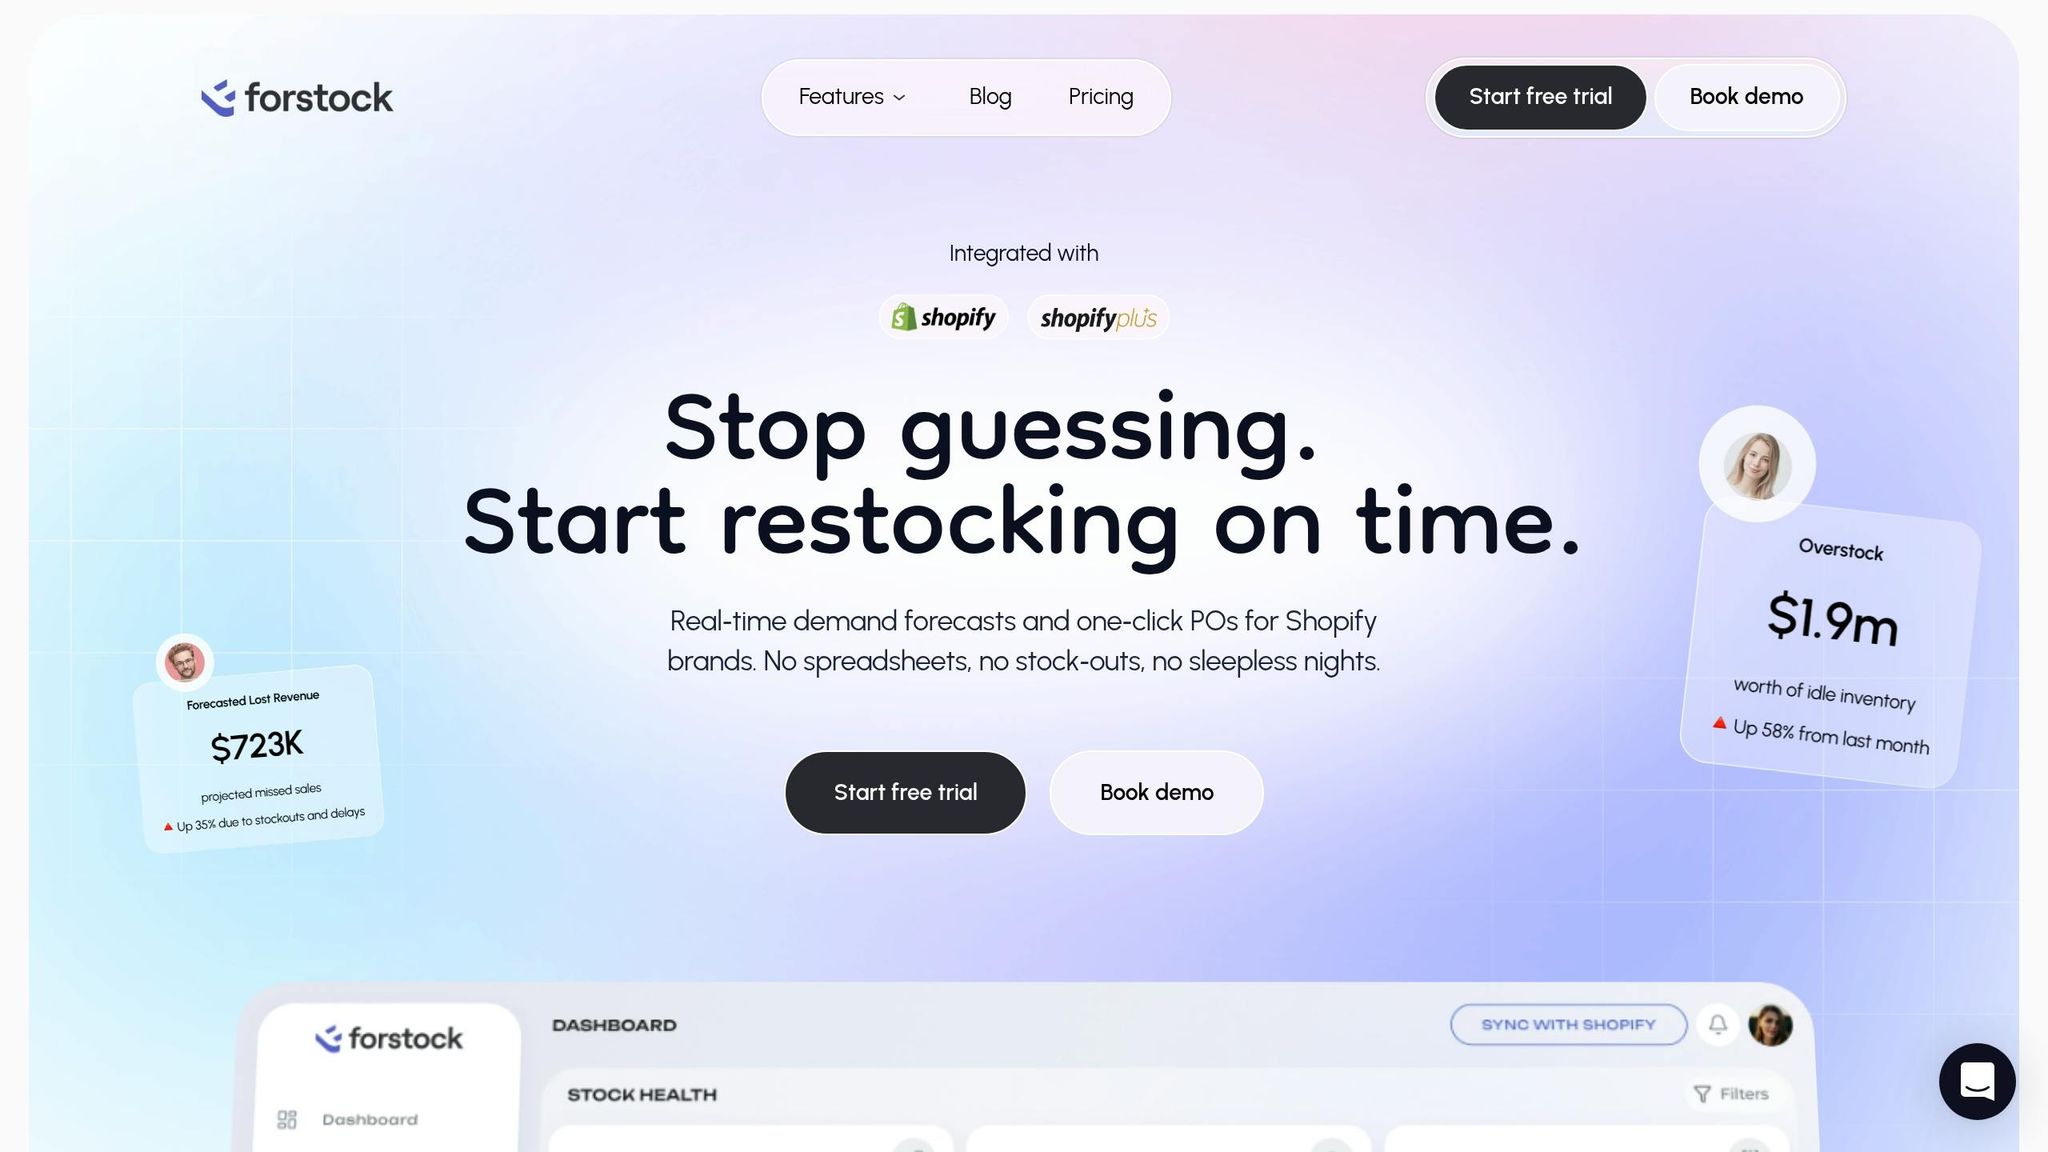
Shopify Admin is great for handling the basics - creating purchase orders (POs), receiving inventory, and updating stock levels. However, when it comes to calculating reorder quantities or keeping track of supplier lead times, you're often stuck juggling spreadsheets. Forstock steps in to fill these gaps with automation and centralized data management. Here's how it simplifies purchase orders, supplier management, and multi-location inventory handling.
Automated Purchase Orders and Demand Forecasting
Forget about manually crunching numbers to estimate reorder quantities. Forstock uses AI-driven demand forecasting to recommend reorder amounts based on factors like sales trends, lead times, and supplier minimum order quantities (MOQs). It even generates purchase orders in seconds, ready to send directly to suppliers - no manual calculations required.
The results speak for themselves. Matt, Operations Lead at TechGear, shared:
"Forstock has been great. We're preventing stockouts that were costing us $50K monthly. The AI predictions are accurate."
Jason, Co-founder at HomeGoods, experienced a 45% drop in excess inventory and freed up $150,000 in working capital by switching to Forstock's AI-powered forecasting. These tools tackle the manual forecasting limitations of Shopify Admin head-on.
Centralized Supplier Management and Lead Time Tracking
Managing supplier details can get messy with Shopify Admin, which only stores a supplier name and a default lead time. Forstock changes the game by centralizing supplier records, including lead times, costs, MOQs, reorder rules, and landed costs like freight and duties. Every purchase order automatically pulls in these details, saving you from cross-referencing multiple spreadsheets.
Alexander, Supply Chain Manager at FashionCo, highlighted the benefits:
"The automated PO creation saves us 10+ hours weekly. Setup was seamless - just 2 minutes!"
This streamlined approach ensures you're working with accurate cost-of-goods figures before inventory even arrives.
Managing Inventory Across Multiple Shopify Locations
If you're managing multiple locations, Shopify Admin can feel clunky. It requires you to manually set the destination for each purchase order and doesn't allow splitting a single order across locations. Forstock offers a better solution: the ability to split purchase orders by location and decide whether to sync inventory updates to Shopify automatically or manually. This feature is particularly helpful for handling partial shipments or quality holds, making inventory management across multiple sites far more efficient.
Forstock’s tools take the stress out of scaling operations, offering the flexibility and automation that Shopify Admin just can’t match.
Conclusion: Setting Up a Purchase Order Process That Works Long-Term
Stocky's shutdown doesn't have to throw your purchase order process into chaos. While Shopify Admin offers the basics - like creating purchase orders, receiving inventory, and updating stock levels - brands looking to scale will need more sophisticated tools to address the gaps.
To cover these gaps, it’s time to rethink your workflow. Start by centralizing supplier data and tracking key details like lead times, minimum order quantities (MOQs), and landed costs. This approach helps you calculate the true cost of goods while leaving behind tedious manual spreadsheets. This shift is essential to effectively use reorder points that prevent stockouts and protect your cash flow.
Tools like Forstock can take this even further. By automating key processes with AI-driven reorder recommendations and real-time inventory syncing, Forstock reduces manual work by 60% and improves how efficiently you manage working capital.
"It is the first tool that actually bridges inventory management and purchasing instead of forcing us to hack things together." - Daniel, Supply Chain Manager
FAQs
What data should I export from Stocky before August 31, 2026?
Before Stocky ceases operations on August 31, 2026, make sure to export all essential data to prevent permanent loss. Key exports include CSV files for:
- Purchase orders
- Stocktake records
- Product costs
- Transfer history
- Inventory reports like ABC analysis and adjustment logs
However, some details, such as supplier information and forecasting settings, cannot be exported. To preserve these, manually document critical data - like contact information, lead times, and reorder logic - using screenshots or by creating a comprehensive master spreadsheet.
How do I handle multiple suppliers or case packs in Shopify Admin?
Shopify Admin includes basic tools for handling purchase orders but restricts the vendor field to just one price per product. If you work with multiple suppliers or deal with case packs, you'll need to manually track details like supplier-specific pricing, lead times, and case pack quantities. To minimize mistakes, make sure to standardize unit conversions (e.g., 1 case equals 24 units). For businesses with multiple locations, assign roles to each site and break down purchase orders accordingly to maintain precise tracking.
How can I automate reordering and prevent stockouts after Stocky shuts down?
To keep reordering seamless and prevent stockouts after Stocky shuts down, consider using an integrated tool like Forstock. Begin by tidying up your catalog - make sure unit costs, SKUs, and supplier details are accurate. Forstock uses real-time Shopify sales data and trends, combined with AI, to determine dynamic reorder points and safety stock levels. This approach ensures your inventory is replenished on time, stays optimized, and eliminates the hassle of managing manual spreadsheets.
Keep reading
Try Forstock free for 14 days.
AI-powered demand forecasting and reorder automation for Shopify brands. No credit card required.