
Shopify Inventory Audit: 9-Step Reconciliation
Step-by-step Shopify inventory reconciliation: export data, count by SKU/location, confirm variances, set quantities, and fix root causes.
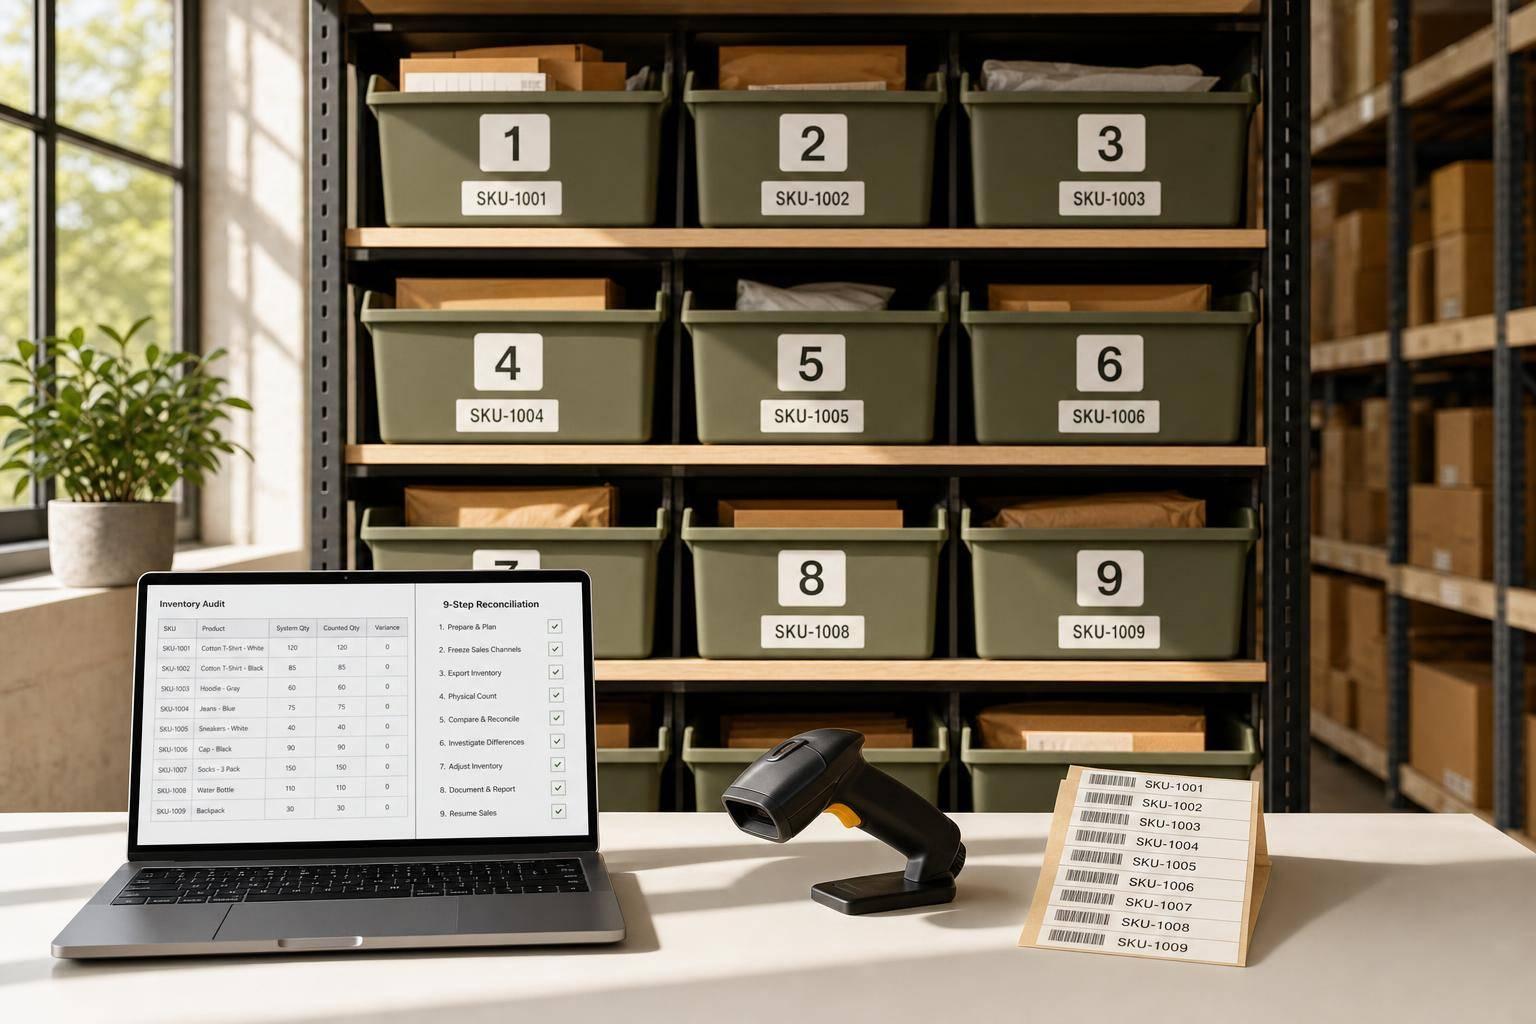
Shopify Inventory Audit: 9-Step Reconciliation
If your Shopify count is off by even 3%, a $2,000,000 store could be sitting on about $60,000 in inventory errors.
I’d sum up this process like this: export the right Shopify data, count physical stock by SKU and location, compare it to on-hand numbers, fix only confirmed variances, and then use the results to stop the same mistakes from happening again. The goal is simple: keep inventory accuracy above 95%, cut oversells, and stop sellable stock from going missing in your system.
Here’s the full audit flow in plain English:
- Pull Shopify inventory exports
- Clean up SKUs and bundle links
- Match every Shopify location to a physical spot
- Freeze stock movement during the count
- Count physical units without showing system quantities
- Separate damaged, returned, and quarantined stock
- Compare physical count vs. on-hand quantity
- Use “Set quantity to” for corrections
- Review root causes like receiving, returns, transfers, and app sync issues
- Finish with sign-off, variance totals, and accuracy results
- Use the cleaned numbers to reset reorder points and cycle counts
A few numbers stand out:
- 20%–25% of ecommerce inventory gaps are tied to returns handling
- 25%–40% of warehouse variances come from receiving errors
- Two-person counting can catch about 95% of manual count mistakes
- Rolling cycle counts of 10%–15% of SKUs per week can help limit drift between full audits
This article is about one thing: how I’d reconcile Shopify inventory step by step without guessing, skipping checks, or making bad adjustments.
Shopify Inventory Adjustments: Track, Audit & Improve
sbb-itb-f0fc809
The 9-step Shopify inventory reconciliation checklist
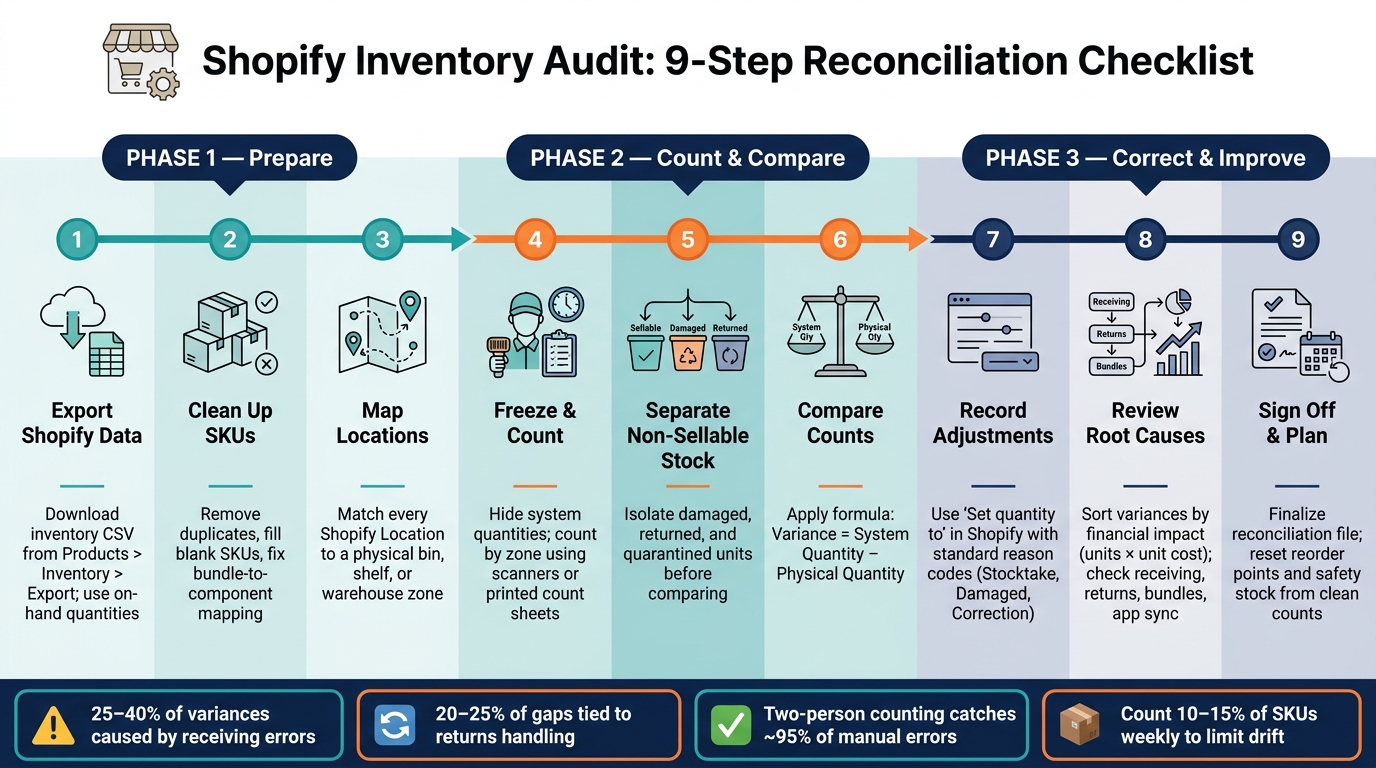
Shopify Inventory Audit: 9-Step Reconciliation Checklist
Steps 1–3: Export Shopify data, clean SKUs, and map locations
Step 1 is getting your baseline with Shopify inventory management. In Shopify Admin, go to Products > Inventory > Export and download the current inventory CSV. That file gives you Shopify’s system quantity.
One thing matters here: reconcile against on-hand quantities, not available quantities. Available stock leaves out units tied to open orders, so it may not match what’s sitting on the shelf.
Step 2 is cleaning up SKUs. Each product needs its own SKU. If two variants share one SKU, or a bundle doesn’t connect to its components the right way, your numbers are off before the count even starts. Check for duplicate SKUs, blank SKU fields, and kits where Shopify isn’t reducing component stock as it should. A lot of teams trip up here by reconciling with product names instead of SKUs. That causes problems fast, since names can vary across variants and sales channels.
Step 3 is mapping locations. Match every Shopify Location to a physical spot: a bin, shelf, backroom area, or warehouse zone. Label bins and shelves clearly. Split sellable stock from damaged, quarantined, and returned units before anyone starts counting. During the count window, freeze stock movement.
Steps 4–6: Count physical stock and compare it to Shopify
Step 4 is the physical count. Count by zone with scanners or printed count sheets. Keep Shopify’s system quantities hidden so the count stays independent. For high-value SKUs, use dual verification: two separate counters in each zone, then compare their results before entering the final count. That extra check catches an estimated 95% of manual counting errors.
Step 5 is pulling out non-sellable units. Set aside returned, damaged, and expired items before counting, and log them on their own. If you mix them into sellable stock, the final number won’t mean much. Returns processing gaps are tied to an estimated 20% to 25% of ecommerce inventory discrepancies.
Step 6 is comparing the physical count to Shopify. Use this formula: Variance = System Quantity − Physical Quantity.
A positive variance means Shopify shows more stock than you physically have. A negative variance means there’s more on the shelf than Shopify shows. Before making any system change, review recent orders, transfer logs, and adjustment history for each SKU with a mismatch. In many cases, the transaction trail explains the gap. After you confirm the variance, record the correction in Shopify.
Steps 7–9: Record adjustments, review root causes, and complete sign-off
Step 7 is updating Shopify the right way. Use "Set quantity to" instead of "Add" or "Subtract." If the number in Shopify is already wrong, adding or subtracting from it just digs the hole deeper. Make each change at the right location, and fill in the reason field every time. Use standard reason codes like "Stocktake", "Damaged," or "Correction" so later reviews are much easier.
Step 8 is root cause review. Don’t just stare at one-off mismatches. Look for repeat patterns. Sort the variance report by financial impact using variance units × unit cost, not only by unit count. That shifts attention to the mistakes that cost the most.
Before you lock in any adjustment, check these areas:
- Return processing
- Receiving history
- Bundle logic
- Manual adjustment history
- App sync failures
The table below shows common variance patterns and what usually causes them:
| Variance Pattern | Likely Cause | Impact | Preventive Action |
|---|---|---|---|
| Phantom Stock (System > Physical) | Receiving error - logged more than arrived | Overselling | Scan every unit against PO at inbound |
| Ghost Stock (Physical > System) | Unrecorded damage or theft | Lost revenue, warehouse waste | Mandatory damage write-off SOP |
| SKU A (+) / SKU B (−) | Picking error - wrong item pulled | Inaccurate stock for both SKUs | Scan-based pick verification |
| Multi-location drift | Transfer not logged or confirmed | Stock "lost" in transit | Two-step transfer confirmation |
Receiving errors alone account for 25% to 40% of all warehouse variances. So if the same inbound SKUs keep showing positive variances, start with receiving. That’s often where the story begins.
Step 9 is sign-off. Finish the audit with a reconciliation file that includes reviewed count sheets, the full adjustment log, and a summary of accuracy rates and total variance value.
How to handle common problem areas during reconciliation
After the variance report, run a few targeted checks to find the usual causes of mismatches before you post Shopify adjustments.
Bundles, components, and variant-level errors
Bundles often create variance when Shopify doesn’t deduct component SKUs after a bundle sale. Before the count, review the bill of materials for every bundle in your catalog and confirm that each sale reduces component inventory the right way. Start by counting components, then check the bundle SKU, and fix any broken mapping before you adjust Shopify. Regular audits also help you maintain accurate inventory turnover metrics for better cash flow.
Match inventory by SKU so each variant lines up with the correct inventory record.
If the mismatch shows up across more than one location, move to transfer status next.
Retail floor, warehouse, and 3PL mismatches
Count every location at the same time and clear any open transfers before you begin. For 3PL locations, compare the warehouse management system export against Shopify’s inventory CSV before the physical count starts.
If location data doesn’t explain the variance, the next place to look is non-sellable units.
Damaged, returned, and non-sellable units
Keep damaged, quarantined, and returned units separate from sellable stock before you compare counts. Put damaged and returned units in a quarantine bin and post adjustments using a daily cutoff. When you write off damaged items in Shopify, use a consistent reason code such as "Damaged" and document the adjustment so you keep an audit trail for later review.
Using audit results to improve future inventory planning
A finished reconciliation does more than fix bad numbers. It gives you a clean baseline for planning. Once the reconciliation is signed off, use the variance log to shape both planning and process fixes.
Turn clean counts into better reorder and purchasing decisions
When your on-hand quantities are right, the decisions that follow get a lot more dependable. Reorder points stop firing because of phantom inventory. Safety stock reflects what’s actually on the shelf. And purchase orders are based on real demand, not bad records.
Use the audit data to reset reorder points, safety stock, and purchase orders from actual on-hand quantities. Start with the highest-value variances first. That’s usually where mistakes hurt the most.
For multi-warehouse brands, a single planning system can push validated counts into replenishment plans and purchase orders.
Once the biggest variances are fixed, step back and look for the patterns behind them.
Use variance trends to build a repeatable control process
One audit shows where you are. A series of audits shows where the process keeps slipping.
When you track discrepancies by SKU, location, and cause - like receiving errors, returns that weren’t restocked, and sync failures - across multiple cycles, repeat issues become hard to miss. That’s where the real process work starts.
The table below shows common repeat causes, how often they tend to happen, and what to do next:
| Discrepancy Cause | Typical Frequency | Recommended Fix |
|---|---|---|
| Webhook sync failure | 1–2% of events | Add an API-based reconciliation pass |
| Returns not restocked | 10–15% of returns | Update return-to-stock SOPs |
| Receiving short-ship | 3–5% of POs | Require scan-based receiving |
| Multi-channel overselling | 2–5 times/month | Increase safety stock on high-velocity SKUs |
Instead of waiting for the next full audit to catch drift, move to rolling cycle counts. Count 10–15% of your SKUs each week so each SKU gets counted 5–7 times a year. Track every adjustment with a reason code. That way, repeat causes show up in reports, and you build a clear audit trail that makes the next reconciliation faster and root-cause analysis easier.
Use those same controls in the next audit cycle.
Conclusion: A simple audit process that keeps Shopify stock accurate
A Shopify inventory reconciliation only works when you complete the whole loop. Once sign-off is done, the audit only matters if you use the corrected numbers. Clean SKU data, location-level counts, separated non-sellable units, investigated variances, documented corrections, and a finished sign-off all depend on the step before it. Skip one, and a clean count can turn into oversells, write-offs, and poor reorder decisions.
When counts are clean, replenishment, forecasting, and purchasing become more reliable. For multi-warehouse Shopify stores, a disciplined audit helps stop oversells, empty bins, and canceled orders from becoming the norm.
FAQs
How often should I audit Shopify inventory?
There’s no one-size-fits-all schedule here. How often you audit depends on your order volume, day-to-day workflow, and how important certain items are to the business.
If you’re processing more than 200 orders per day, daily reconciliations may make sense. If your volume is more moderate, weekly audits are often enough.
A lot of teams also rely on a couple of common counting methods:
- Cycle counts: Audit about 10%–15% of SKUs each week
- ABC method: Count top-selling or high-value items monthly, and check lower-priority items every 4–6 months
The goal is simple: match the audit schedule to the pace of your operation and the risk tied to each item.
What if I can't freeze stock movement during the count?
If you can’t fully stop stock movement, log all activity during the count so you keep a clean baseline.
When possible, pause work in the area you’re counting. If fulfillment still needs to move forward, quarantine picked but unshipped orders and count them separately instead of folding them into general stock. That way, reconciliation stays tied to objective records, not guesswork.
How do I audit bundles across multiple locations?
Reconcile bundle components at each location. Run counts at the same time across warehouses, retail stores, and 3PLs so inventory in transit doesn’t create avoidable mismatches.
For every bundle, compare the physical count of each component against your system records. If the numbers don’t match, do a dual-count first. Then update Shopify with the set quantity feature so you don’t stack one error on top of another.
Keep reading
Try Forstock free for 14 days.
AI-powered demand forecasting and reorder automation for Shopify brands. No credit card required.