How to Transfer Stock Between Locations in Shopify
Step-by-step guide to creating and managing Shopify Transfers to move stock between locations, track shipments, and keep inventory accurate.
How to Transfer Stock Between Locations in Shopify
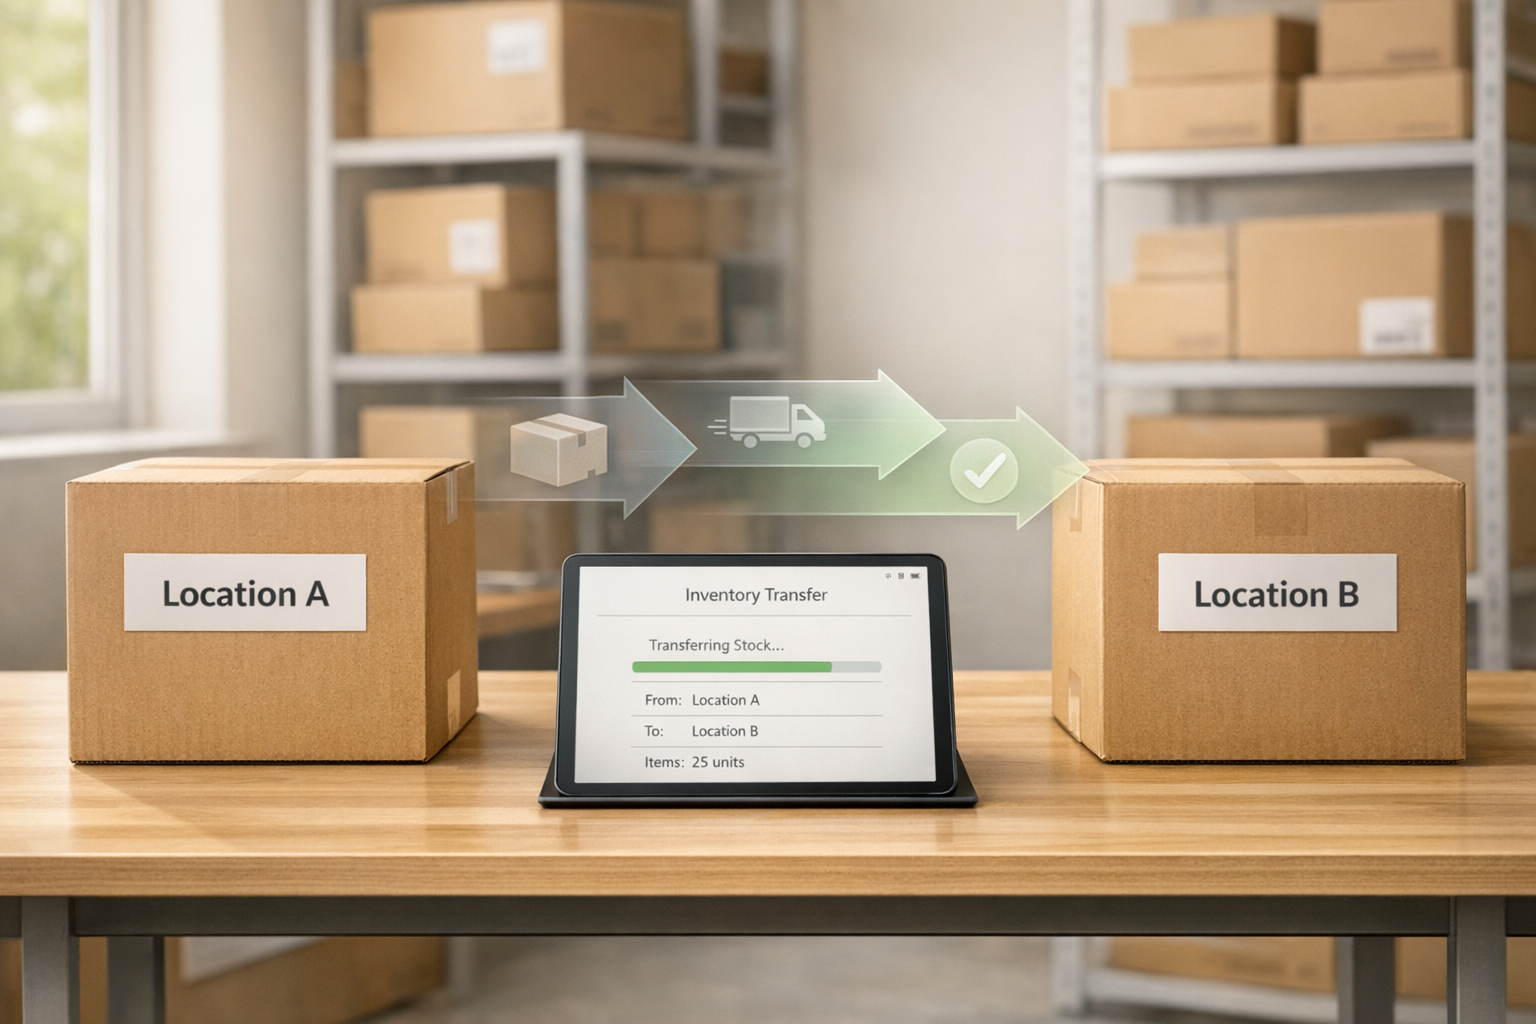
Managing inventory across multiple locations in Shopify is straightforward using the Transfers feature. This tool lets you easily move stock between locations, track shipments, and update inventory records automatically. Here’s how it works:
- Set Up Locations: Add and activate at least two locations in Shopify inventory management (e.g., warehouses, stores). Your Shopify plan determines how many locations you can manage.
- Assign Inventory: Allocate stock to each location under Products > Inventory.
- Create Transfers: Use Products > Transfers to draft, finalize, and track stock movements.
- Track Status: Update transfer statuses (e.g., Ready to ship, In progress) to reflect progress and keep records accurate. This is a key part of tracking multi-location stock effectively.
- Receive Stock: Confirm received quantities to update inventory at the destination automatically.
Shopify handles the logistics of reserving, tracking, and updating stock during transfers. Tools like Forstock can further simplify inventory management with demand forecasting and automation. This process ensures you have the right products at the right locations, reducing errors and improving efficiency.
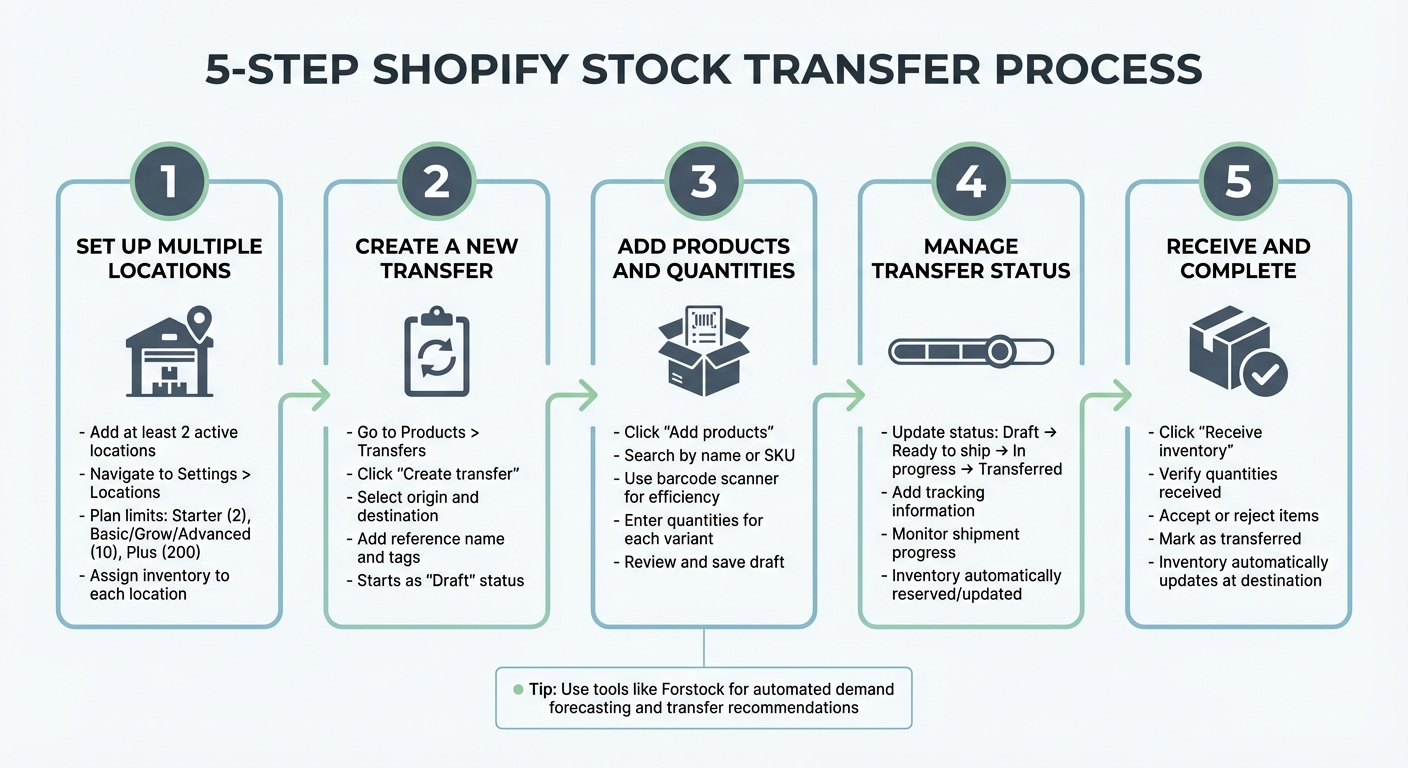
5-Step Process for Transferring Stock Between Shopify Locations
Shopify 101: Easiest way to transfer inventory from one location to another (2025)

Step 1: Set Up Multiple Locations in Shopify
To start transferring stock between locations, you'll need at least two active locations set up in your Shopify admin. A location in Shopify can be a physical store, warehouse, or even an app used for selling, fulfilling orders, or storing inventory. Without multiple active locations, the Transfers feature won't be available.
The number of locations you can manage depends on your Shopify plan. For instance, Starter plans allow up to 2 active locations, while Basic, Grow, and Advanced plans support up to 10. If you're on Shopify Plus, you can manage as many as 200 active locations. Archived or deactivated locations don't count toward these limits, so you can store older locations without affecting your plan's capacity.
Add and Activate Locations
To add a new location, navigate to Settings > Locations on your Shopify admin (desktop or mobile). Click Add location, enter a unique name (e.g., "Los Angeles Warehouse" or "Toronto Retail Store"), and provide the address. Then, hit Save. Shopify uses Google to verify addresses - unverified ones won't allow local delivery or shipping label options. Newly added locations appear at the bottom of your order routing list and are immediately available for online purchases. If you need to reactivate a location, simply select it and click Activate location.
Once your locations are set up, you can start assigning inventory to each one.
Assign Inventory to Locations
After setting up your locations, go to Products > Inventory to allocate real-time inventory levels for each site. Make sure "Inventory tracked" is enabled for your products, and set the "Inventory will be stocked at" dropdown to "Multiple locations." Each location's inventory is tracked separately, so stock levels aren't shared across sites.
For stores with extensive catalogs, you can save time by using the bulk editor to update up to 50 products at once. If you're managing over 100 products, importing a CSV file might be a better option. Both methods help ensure accuracy and efficiency when updating inventory across multiple locations.
To simplify multi-location inventory management even further, consider integrating your Shopify store with tools like Forstock. Forstock provides a centralized dashboard with real-time demand forecasting and inventory analytics, helping you keep track of stock levels and streamline your operations.
Step 2: Create a New Transfer in Shopify
Now that your locations are set up and inventory is assigned, it's time to start moving stock. Shopify's Transfers tool makes it easy to track inventory as it moves between locations, ensuring your records stay accurate.
Access the Transfers Feature
To get started, log into your Shopify admin. From there, go to Products > Transfers and click Create transfer. This opens a new transfer record, which begins as a Draft. Drafts allow you to make changes before finalizing the transfer. If you're working with external suppliers or locations outside Shopify, you can leave the origin or destination fields blank. This is particularly useful when integrating multi-supplier data in Shopify to streamline your procurement workflow.
Define Transfer Details
Start by selecting the origin and destination locations from the dropdown menus. Then, add a unique reference name, like "LA-to-NYC-Jan2026", to easily identify this transfer. You can also use tags to organize transfers by priority, vendor, or season - helpful when juggling multiple stock movements.
If needed, click the pencil icon to add special instructions (e.g., "Restocking for spring launch"). For accounting purposes, you can adjust the Date created field to reflect a specific date. You also have the option to include an Estimated arrival date to help the receiving location prepare, though this step is optional while the transfer is still in draft form.
For larger transfers involving many product variants, you can save time by clicking Import and uploading a CSV file. If you're working with high volumes, using a barcode scanner can further streamline the process and reduce errors when selecting items.
Once these details are set, you’re ready to move on to adding products and quantities.
Step 3: Add Products and Specify Quantities
It's time to add the products you're transferring. Click Add products to open the search interface. Here, you can either type a product name or SKU directly into the search bar or click Browse to access your full inventory list. If you're looking for a specific variant, searching by SKU is your best bet.
Working in a warehouse or retail setting? Save time and reduce mistakes by using a barcode scanner. Shopify supports barcode scanning with POS devices or connected scanners, making it easy to scan physical items and add them directly to your transfer list. This is especially useful when handling large quantities and ensures each item matches your physical stock.
After adding products, enter the quantity for each variant in the Quantity column. Double-check that the quantities align with the stock at the origin location to optimize inventory across your warehouses. Keep in mind, Shopify won't hold inventory until the transfer is moved out of draft status. This means there's a risk of specifying more units than you actually have on hand. If you’re importing a CSV, be aware that it will overwrite existing quantities for any variants already included in the transfer.
Before proceeding, take a moment to review the entire product list and quantities. While the transfer is still in draft status, you can make changes - add, remove, or adjust items - without affecting your inventory. This is your opportunity to catch any errors before the stock gets reserved. Once everything checks out, click Save to secure your draft. Next, move on to Step 4: Manage and Track Transfer Status.
sbb-itb-f0fc809
Step 4: Manage and Track Transfer Status
Keep your transfer status updated to reflect its progress. To do this, go to Products > Transfers, open the specific transfer's detail page, and use the Mark as button to adjust its lifecycle stage (e.g., Ready to ship, In progress, Transferred).
Understanding Transfer Statuses
Each transfer status triggers specific inventory actions:
| Transfer Status | Inventory Impact | Description |
|---|---|---|
| Draft | No impact | The transfer has been created, but inventory remains unreserved. |
| Ready to ship | Reserved at Origin | Stock is held at the origin location, unavailable for sale, as it’s prepped for shipment. |
| In progress | Incoming at Destination | Items are in transit and marked as incoming at the destination. |
| Transferred | Available at Destination | Items have been received and added to the sellable inventory at the destination. |
| Canceled | Returned to Origin | Reserved stock is released back to available inventory at the origin. |
Shopify automatically logs all status changes and shipment events for each transfer. This audit trail is particularly helpful for transfers initiated by third-party cloud inventory tools like Stocky, where the Source column on the Transfers page shows the originating app.
Adding Shipping and Tracking Information
Once a transfer is marked as Ready to ship, you can create a shipment within the transfer record to add shipping details. This includes the tracking number and carrier, which makes it easier to monitor shipments and resolve any issues if they arise.
Shopify also allows for multiple shipments within a single transfer. This feature is especially useful for tracking partial deliveries separately. After this, proceed to Step 5 to verify and finalize your transfer.
Step 5: Receive and Complete the Transfer
After sending your shipment, the next step is to receive it at the destination and finalize the transfer process. Once the shipment arrives, go to Products > Transfers in your Shopify admin. Locate the pending transfer and click Receive inventory to open the quantity adjustment screen, where you’ll confirm what has actually been delivered.
Verify and Mark as Received
For each product line, input the number of items received in the Accept column. If some items are damaged or missing, record those in the Reject column to ensure they aren’t added to your sellable inventory. Tracking these discrepancies is vital for maintaining accurate inventory turnover metrics. To save time, you can use Accept all unreceived or Reject all unreceived for bulk updates.
Before saving, double-check the physical counts against the digital record. If you mistakenly receive too many items, you can fix this by entering a negative value to adjust any overages. If everything in the shipment matches your records, you can use the Mark as transferred option on the main transfer page to finalize the receipt and update your inventory automatically.
Once everything is verified and accepted, the inventory will be updated accordingly.
Automatic Inventory Updates
When the transfer is marked as Transferred, Shopify automatically clears the reserved stock from the origin location and adds it to the available inventory at the destination. You can confirm these updates by checking the Available column on the Inventory page or reviewing the Adjustment history for specific product variants.
If only part of the shipment is received, Shopify will continue tracking the remaining items as Inbound until they are either accepted or rejected. The adjustment history log provides a detailed record, including the date of the update, the activity (like "Received"), the staff member involved, and the resulting quantities. Shopify keeps this inventory modification history for each product variant for up to 90 days.
Common Mistakes and Best Practices for Stock Transfers
Common Errors and Their Impacts
Even small mistakes in stock transfers can throw off your inventory accuracy, creating ripple effects across your operations.
For instance, skipping Shopify's Transfers feature and opting for manual adjustments can lead to missing audit trails and skipped destination verifications, making it hard to track stock movements effectively. Another common pitfall is delayed logging - when stock moves aren’t recorded immediately, digital records fall out of sync with physical inventory. This mismatch often results in overselling and delayed order fulfillment.
Misunderstanding key inventory statuses like "On-hand", "Available", and "Committed" can also cause over-allocation, leading to unfulfilled promises to customers. Relying on informal tools like Slack, email, or spreadsheets to manage transfers is another risky move - it opens the door to errors and increases the likelihood of misshipments.
These aren't minor issues. Human errors alone account for 46% of inventory inaccuracies, and globally, inventory distortions cost businesses a staggering $1.77 trillion every year.
Best Practices for Accurate Transfers
To avoid these costly mistakes, here are some effective strategies for ensuring accurate stock transfers:
- Use Shopify's Transfers feature to automatically deduct stock from the origin location and add it to the destination only after physical verification.
- Set precise reorder points by factoring in SKU velocity, supplier lead times, and seasonal demand.
- Perform regular cycle counts to catch discrepancies early and integrate barcode scanning during transfers to minimize manual entry errors.
If you’re managing inventory across multiple locations, planning transfers based on real sales data can help you avoid both stockouts and overstock situations. Tools like Forstock can make this process seamless. Forstock integrates with Shopify to provide AI-driven demand forecasting and automated reorder suggestions, helping you decide what to move and when. Its real-time dashboard tracks inventory across all locations, alerting you to low stock levels before they become a problem. Plus, it can automatically trigger transfers or purchase orders, saving you hours of manual coordination. By centralizing supplier communication and analytics, Forstock empowers you to make data-backed decisions that improve cash flow and enhance customer satisfaction.
Conclusion
Moving stock between Shopify locations is a simple and efficient process when you use Shopify's transfer workflow. This tool not only keeps your inventory records accurate but also helps you make smarter decisions about where to place your stock.
Beyond just accuracy, strategic transfers can save you money by reducing excess holding costs and improving your inventory turnover and ensuring your products are where they need to be. Properly tracking transfers also creates a clear audit trail, making troubleshooting easier and keeping your team on the same page.
While Shopify's built-in tools are great for managing inventory, they don’t include demand forecasting. That’s where Forstock steps in. Powered by AI, Forstock provides demand forecasting and automated reorder suggestions. It analyzes sales trends across all your locations to recommend what to move and when. Its real-time dashboard keeps an eye on inventory in transit, sends alerts for low stock before it becomes an issue, and can even automate transfers based on your sales data. This means less time juggling spreadsheets and more confidence in your inventory strategy.
Start by using Shopify’s transfer feature to build a solid foundation, then take it a step further with Forstock’s AI-powered tools to keep your inventory balanced and optimized across all locations.
FAQs
How do I accurately update inventory when transferring stock between locations in Shopify?
To keep your inventory accurate during stock transfers in Shopify, start by enabling inventory tracking for your products. This step ensures that quantities automatically update once transfers are completed.
While setting up a transfer, carefully verify the origin and destination locations. Mark the transfer as pending before finalizing it - this gives you a chance to review and make any necessary adjustments to quantities. When the stock is delivered, you can accept or reject individual items to match the actual quantities received.
By regularly reviewing transfers and promptly updating your inventory after receipt, you can maintain consistent stock levels across all locations, minimizing errors and improving overall inventory management.
What are the advantages of using Shopify's Transfers feature to manage inventory across locations?
Shopify's Transfers feature is a game-changer for managing inventory across multiple locations. It helps you avoid stockouts by allowing you to move products between locations, ensuring your items are exactly where they need to be. This means fewer missed sales opportunities and less reliance on unnecessary purchase orders.
It also makes storage management more efficient. By reallocating excess stock from overstocked locations to places with higher demand, you can lower holding costs and cut back on markdowns. Plus, the feature includes real-time tracking of inventory movements, giving you an accurate and up-to-date view of stock levels across all locations. This level of transparency not only speeds up fulfillment but also helps you make smarter decisions, keeping your operations smooth and ensuring your customers stay happy - even as demand shifts.
How can Forstock improve inventory management for Shopify merchants?
Forstock transforms how Shopify merchants handle inventory by providing real-time demand forecasting, automated purchase orders, and in-depth inventory analytics. These features tackle common headaches like running out of stock or overstocking, while also making it easier to transfer inventory between locations. Merchants can keep tabs on stock levels across multiple sites and streamline supplier management with ease.
Powered by AI, Forstock adjusts to shifts in sales trends, lead times, and seasonal patterns, ensuring inventory stays accurate and well-balanced. By automating repetitive tasks like creating purchase orders and managing stock transfers, merchants save time, minimize mistakes, and can focus on scaling their business. Forstock simplifies the complexities of multi-location inventory management, boosts cash flow, and helps brands meet customer demand with confidence.
Keep reading
Try Forstock free for 14 days.
AI-powered demand forecasting and reorder automation for Shopify brands. No credit card required.